Whether you’re an avid homemade baker or the top chef, pastry fanatics agree that the baked goods world would be inert without vanilla flavored pastries. Soft, airy textured pastry, perfectly paired with vanilla bean pastry cream filling… that’s the kind of dessert to die for. No wonder why plain-flavored pastry is the best canvas to showcase vanilla bean sweetness.
From vanilla danish pastry to choux pastry like eclair, these vanilla flavored pastries are completely worth baking at home. Let’s give it a round to bake your own lip-licking desserts with these well-loved recipes!
Vanilla Bean Pastry Cream Recipe

Let’s learn how to make the base that will change your plain-flavored pastry entirely: The filling!
To make a soft and creamy vanilla bean pastry cream, you’ll need the following:
- 7 tablespoons of sugar
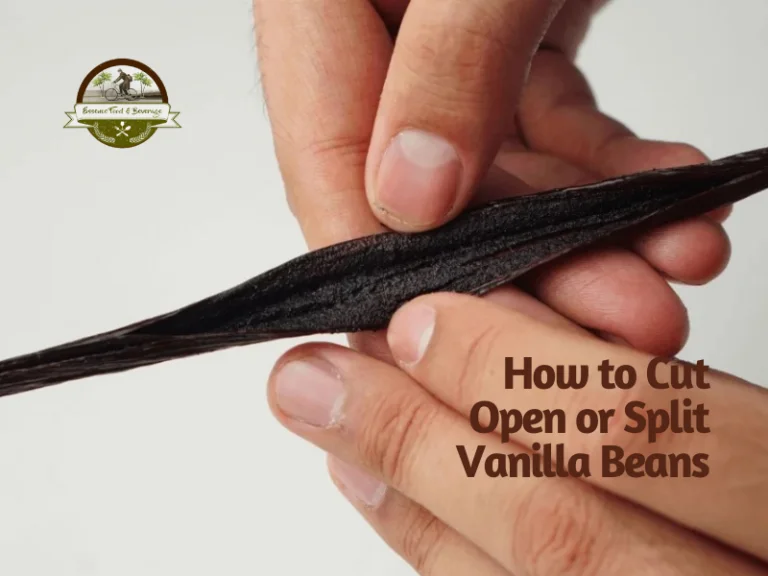
- 1 whole vanilla bean (don’t forget to split up and scrape out the vanilla caviar first)
- 3 cups of milk (whole milk is highly recommended)
- ¼ teaspoon of salt
- 2 tablespoons + 2 teaspoons of cornstarch
- 4 egg yolks
- 3 tablespoons of unsalted butter (better cold)
After getting the ingredients ready, do the following steps:
- Heat the milk over low heat until it gets steam, and turn off the heat.
- In a mixing bowl, add sugar, egg yolks, and cornstarch. Whisk until it reaches a thick and creamy consistency.
- Slowly pour half of the milk into the sugar mixture, and whisk until it blends.
- Once it blends, mix the mixture with the rest of the milk.
- Continue heating the milk mixture, now over medium heat until it reaches thick consistency (be careful not to burn it!).
- Remove the heat. Add unsalted butter and vanilla caviar (from the vanilla bean you split up earlier). Whisk until it blends perfectly.
- Move the cream mixture into a bowl, and put the bowl inside a larger bowl filled with ice water. Let it cool for 30 minutes.
- Lastly, refrigerate vanilla bean pastry cream for at least 4 hours prior to use. You can keep this vanilla bean pastry cream fresh for only 3 days.
If you’re planning to bake for wholesale, making this vanilla bean pastry cream a day before your busy baking day is highly recommended, while maintained in a cold area. Vanilla bean pastry cream needs to be refrigerated for hours before ready to use, and making it before baking the dough will save more of your time!
Vanilla Bean Eclairs

Eclair is a french-origin choux pastry in an elongated shape and dipped into the ganache. If you split up the eclair, it reveals the pastry cream fillings inside.
Before making the eclairs dough, make sure you’ve made the vanilla bean pastry cream first. After that, you’ll need:
For the choux pastry
- 125 grams of flour
- 4 eggs
- 100 ml of milk
- 100 ml of water
- 80 grams of unsalted butter
- Half teaspoon of salt
- 2 teaspoon of sugar
For vanilla bean ganache
- 1½ cups of sugar
- 1 whole vanilla bean (split up and scrape out the vanilla caviar)
- 2 tablespoons of milk
- A pinch of salt
How to make vanilla bean eclairs:
- Preheat the oven to 180 degrees C.
- Prepare the choux dough while waiting for the oven to heat. Mix together the milk, sugar, salt, water, and butter in a pan and let it boil. When it boils, turn off the heat.
- After that, sift the flour and add it to the milk mixture. Whisk until it blends evenly.
- Cook over low heat for a minute, then transfer the dough into a bowl and let it cool.
- Put the dough in a piping bag with a round or star tip. Pipe the dough in a baking sheet until it shapes long strips and measures 10-12 centimeters.
- Then, dust the powdered sugar over the top of the dough and bake for 40 minutes. In the first 10 minutes, let the oven door slightly open to let out the steam. Then, continue baking until it changes to a golden color.
- Bring the eclairs out from the oven then prick the bottom parts of the eclairs to let out the steam and let it cool. You need to make 3 medium-sized holes for each eclair.
- Prepare the vanilla bean pastry cream filling by putting it up in a piping bag.
- Lastly, fill the eclairs with vanilla bean pastry cream filling. Repeat this step until you have no plain eclairs left.
If you want additional visual key points for your eclairs, let’s continue to make vanilla bean ganache! In making a vanilla bean ganache, you’ll need to follow these following steps:
- Mix together milk, sugar, salt, and vanilla bean caviar in a bowl, then whisk until it reaches smooth consistency.
- Every time the ganache hardens, add a teaspoon of milk to melt it.
After making your vanilla bean ganache, dip your eclairs into the ganache. Voila, now you got your eclairs ready to eat!
Vanilla Peach Puff Pastry Mini Pie

You might be familiar with the big-sized, shared-portion version of pie. But this time, you’ll make the sweet and mini-sized one. Imagine a pastry dough meeting vanilla sweetness and sweet-sour peach. To make vanilla peach puff pastry mini pie, you’ll need vanilla bean pastry cream (check the first recipe) and these ingredients:
For filling:
- 3 large peaches
- 1½ tablespoons and ¼ teaspoon of lemon juice, separated
- ¼ cup of brown sugar
- ½ tablespoon of honey
- A pinch of sea salt
- A cup of milk
- 1 whole vanilla bean
- 3 egg yolks
- Half a cup of sugar
- 3 tablespoons of flour
- 2 tablespoons of unsalted butter
For the pastry dough:
- 1½ cups of flour
- Half a teaspoon of salt
- ⅓ cup and 2 tablespoons of water
- 6 tablespoons of cold unsalted butter
- 1 egg
After getting the ingredients ready, let’s make the peach puree for the filling first:
- Peel and chop the peaches into small pieces.
- In a bowl, combine the sliced peaches and 1½ tablespoons of lemon juice, brown sugar, honey, and salt.
- Cook over medium heat and stir regularly until the peaches’ texture changes. It takes approximately 15-20 minutes.
- Move the peaches puree to a blender or food processor and blend until it gets puree’s texture (smooth but not fully blended).
- Lastly, place in a bowl and refrigerate for 1 hour. Regularly stir every 15 minutes to fasten the cooling process.
Once the filling is ready, you can start making the pastry dough. Do these following steps:
- Combine together flour, salt, and water in a bowl and whisk until it reveals a dough consistency.
- After it gets a dough texture, dust it with flour and wrap it in parchment paper. Freeze the dough for 15 minutes.
- Sprinkle the flour onto the table and place the dough there. Roll it until it measures 8 x 11 inches.
- Slice the butter and arrange it to cover two-thirds of the rectangular dough.
- Then, brush the egg over the surface of the dough.
- Fold the dough into an envelope shape, the open top third halfway over the buttered area. Don’t forget to eliminate the air left in your dough.
- Fold the bottom part of the dough (the buttered third of the dough) until it measures 8 x 3 ⅔ inches. Seal them together and trim the edges of the dough.
- After that, rotate the dough 90 degrees and roll it out until it measures 8 x 11 inches.
- Sprinkle the flour on the dough and repeat step 11 for 3 folds. After that, freeze the dough for 20 minutes.
- Take out the dough and roll until it measures 10 x 15 inches. Trim the edges.
- Spread the peach puree and vanilla bean pastry cream in the middle part of the dough. The peaches puree on the bottom, while vanilla bean pastry covered up the puree.
- Brush the egg evenly on the surface. Then, fold both left and right sides toward the center (covering the filling). Seal and flip down the dough.
- Refrigerate the dough while you prepare the oven. Preheat to 400 degrees F (for convection oven) or 425 degrees F (regular oven).
- Before baking, brush the dough with more eggs and cut some lines on the surface to let out the steam. Bake for 35 minutes until it changes color to golden.
- Let it cool before eating!
Every time you spot the melted butter in your dough when making this recipe, don’t worry! Just brush the melted butter evenly to the dough surface and sprinkle a bit of flour. Another important thing: Don’t forget to check the air pocket in your dough regularly, and if any, remove them.
Vanilla Bean Danish

Danish pastry is a Denmark-origin puff pastry. It’s a light-textured pastry filled with fillings inside. The fillings may vary from nuts, jams, fruits, or pastry cream. In this vanilla bean danish recipe, you’ll need to make vanilla bean pastry cream fillings (check the first recipe) and pastry dough.
Ingredients:
- 500 grams of all-purpose flour
- 12 grams of salt
- 140 grams + 1 teaspoon (for egg wash) of water
- 55 grams of sugar
- 11 grams of yeast
- 40 grams and 280 grams (for the butter layer) of unsalted butter
- 140 grams of milk
- 1 egg
Since this recipe will take a little longer to make, it’s better to divide the production time into 3 days. Let’s do the following steps:
1st day
- In a mixer’s bowl, combine together the flour, salt, water (140 grams), sugar, yeast, unsalted butter (40 grams), and milk. Knead until it turns into a dough consistency.
- Remove the dough from the bowl and cover it with plastic wrap. Refrigerate overnight.
2nd day
- Cut the butter (280 grams) into small cubes and arrange it onto a 15 x 15 centimeters pastry mat. Then, fold the mat over the butter and push the butter using a rolling pin until it measures 17 x 17 centimeters. Refrigerate the butter for half an hour.
- Take out the dough from the refrigerator and roll it out until it measures 26 x 26 centimeters.
- Take out the butter from the refrigerator and arrange the butter at a 45-degree angle from the dough. The dough will be shaped into an envelope and stretched over the butter. Press the dough to seal it together.
- Roll the dough with the butter fully enclosed until it measures 20 x 60 centimeters. Then, fold the dough until it shapes like a letter inside the envelope.
- Cover the dough with plastic wrap and refrigerate for half an hour.
- Repeat step 4, then refrigerate the dough for half an hour.
- Then, repeat step 4 and refrigerate the dough overnight.
3rd day
- Take out the dough from the refrigerator and roll it out until it measures 20 x 110 centimeters.
- Shape and fill the pastry dough with vanilla bean pastry cream.
- After that, let it rest in a room-temperature place for 2 hours.
- Before baking, brush the egg over the dough surface.
- Bake the danish pastry dough at 400 degrees F for 15 minutes.
- Voila, your vanilla bean danish pastry is ready to eat!
After the first bite, you’ll know why baking your own vanilla bean danish is worth the struggle. If you don’t want to consume it all immediately, you can refrigerate your danish pastry. You only need to reheat your danish pastry whenever you want to consume it by re-baking it for 5 minutes at 250 degrees F.
Vanilla Bean Custard Croissant

Croissant is a staple in bakery shops. Although croissants might take days to make, this timely yet delicious bread filled with vanilla cream is always worth it.
For this recipe, you first willneed to prepare the vanilla bean pastry cream filling before making the croissant dough. Once you’re done with the pastry cream, these are the ingriendts you will need to make the dough:
For croissant dough:
- 500 grams of all-purpose flour
- 55 grams of sugar
- 11 grams of yeast
- 12 grams of salt
- 140 grams of water
- 140 grams of milk
- 40 grams of unsalted butter
For the additional spread:
- 280 grams of unsalted butter
The croissant recipe is a complex one. That’s why it’s wise to divide the production days into 3 days of work. To make a vanilla bean custard croissant, do the following steps:
1st day
- Place the flour, sugar, salt, yeast, water, milk, and unsalted butter in a mixer’s bowl.
- Then, set the mixer on a low speed and beat the dough for 3 minutes.
- Shape the butter dough into a flattened ball shape and cover it with plastic wrap. Refrigerate overnight.
2nd day
- Cut the butter dough into 1-centimeter thickness and arrange the dough on parchment paper.
- Shape the butter dough into a square-shaped. Just push the dough with your hands until it becomes a 17 x 17-centimeter square.
- Next, refrigerate the butter dough.
- Now, roll the croissant dough until it measures 26 x 26 centimeters.
- Take the butter dough from the refrigerator and place it in a diamond shape on the croissant dough.
- Fold the edges of the dough to envelop the butter dough. Then, press the edges together on the center of the dough.
- Then, roll the dough until it measures 20 x 60 centimeters.
- Fold the croissant into a letter shape and refrigerate for half an hour.
- Place the dough on the table with the ‘open side’ facing you and roll the dough until it measures 20 x 60 centimeters for the second time.
- Cover the dough with plastic wrap and put it in the refrigerator overnight.
3rd day
- Roll the dough until it measures 20 x 110 centimeters.
- Place the dough on a cutting board, mark 6.26 centimeters in the bottom of the dough and 12.5 centimeters all over the dough.
- Shape the dough into triangles by cutting it diagonally.
- Pull the dough to make it stretch and longer.
- Now, it’s time to shape the dough! Roll the dough and place the tip of the triangle down. Repeat this step until you have no dough left.
- Brush the egg evenly on the dough’s surface and let it rest for 2 hours before baking.
- Before ready to bake, brush the egg for the second time.
- Then, bake your croissant dough at 410 degrees F for 7 minutes.
- After 7 minutes, turn down the heat to 375 degrees F for 13 minutes.
- Take the croissant out of the oven and let it reach room temperature.
- You’re almost done! Now, fill the croissant with vanilla bean pastry cream using a piping bag. Repeat this step until you have no-filling croissant left.
- Your vanilla bean custard croissant is now ready to eat!
If you don’t want to consume all your croissants in one sitting, you can always save your croissants for other days. Put the croissants in the freezer. It can last for up to 1 month. When you want to eat the croissants, you just need to re-bake your croissants in the oven for 7 minutes at 350 degrees F.
Puff Pastry Vanilla Bean Ice Cream Sandwich
A regular frozen treat might be boring. So what holds you from leveling it up to an upgraded version? Try to add puff pastry and turn it into a puff pastry vanilla bean ice cream sandwich. A buttery and flaky layer of puff pastry is a perfect match to a creamy vanilla bean ice cream, yum! To make a delicious puff pastry vanilla bean ice cream sandwich, you need:
Vanilla bean ice cream ingredients
- 3 cups of heavy cream
- 1 whole vanilla pod (split up and scrape out the vanilla caviar)
- 2 cups of milk (feel free to choose dairy milk or plant-based milk)
- 1 ½ cups of sugar
Sandwich layer ingredients
- A sheet of puff pastry
Once the ingredients are prepared, let’s prepare the vanilla bean ice cream first:
- Combine cream, sugar, and milk in a medium saucepan. Cook over medium heat and stir it regularly until the sugar is dissolved.
- Turn off the heat and add vanilla caviar and the empty vanilla pods.
- Let it chill for at least 30 minutes. Then, transfer the milk mixture to the ice cream maker.
- Churn the ice cream based on the manufacturer’s instructions. Again, different machines might have different instructions. So it’s wise to read the instructions carefully.
- Once the churning process is done, transfer the ice cream mixture to a container.
- Let it refrigerate for 1 to 4 hours.
While waiting for the ice cream to freeze, you can prepare the puff pastry. Follow the steps below:
- Line the baking sheet with parchment paper and preheat the oven to 375°F or 177ºC. Sprinkle the flour on the flat surface and unfold the pastry. Roll the pastry sheet until it measures 11 inches x 14 inches.
- Cut the puff pastry into circles and place the puff pastry on the baking sheet.
- Place another parchment paper and baking sheet on top of the dough to create a thin crispy puff pastry.
- Bake for around 25 minutes and remove the parchment paper on the twentieth minute.
- Then, let it cool for a few minutes before removing another parchment paper layer.
- Once it cools completely, shape the ice cream just like the shape of puff pastry.
- Sandwiched the ice cream with puff pastry layers and transferred it to the freezer for 20 minutes.
- It’s ready to be served! Consume it immediately or keep it in the freezer for up to 1 week.
It’s highly recommended to add toppings to your puff pastry vanilla bean ice cream sandwich. Just be creative with what’s in your kitchen. Be it icing sugar, chocolate spread, strawberry jam, or even sliced fruits.
Vanilla Bean Mille Feuille

“Mille Feuille” means a thousand leaves or layers in French. So this mouthwatering dessert is named after its pastry layers. Between the layers lies a creamy vanilla bean pastry cream, topped with various toppings. Cocoa powder, chocolate glaze, icing sugar, or sliced almonds are some to mention. To get started, you need vanilla bean pastry cream and the other ingredients below:
For pastry layer
- A pack of puff pastry
For vanilla bean icing
- 2 whole vanilla pods (split up the pods and scrape out the vanilla caviar)
- 3 cups of confectioners’ sugar
- ¼ cup of milk
- ¼ cup of cocoa powder
Once all ingredients are prepared, let’s make the pastry layers first:
- Unfold the sheet on a flat surface. Then, preheat the oven to 400°F or 204°C.
- Roll the sheet until it measures 1/16 an inch and cut it into 2 inches x 4 inches rectangles.
- Line the baking sheet with parchment paper and bake the puff pastry dough. Line another parchment paper and baking sheet on top of the puff pastry dough.
- Bake for about 11 minutes and let it cool on a cooling rack. Cut the edges with a sharp knife to neaten the shape.
After the puff pastry has been prepared, just move on to the vanilla bean icing:
- Add the confectioners’ sugar, vanilla beans, and 3 tablespoons of milk to a large bowl. Then, whisk it together and gradually add the milk. Be careful not to turn the texture too watery.
- Move ⅓ cup of icing to another bowl. Add cocoa powder and a tablespoon of milk. Whisk together until it reaches a smooth consistency.
- Make sure the texture of vanilla bean and chocolate icing is similar. If one is too thick, try to add more milk until the consistency matches.
- Transfer the vanilla bean and chocolate icing into a piping bag, use the small round tip only.
Now, it’s time to create the pastry and cream layers! To make a perfect vanilla bean mille feuille, follow the instructions below:
- To make the top layer, lay out 9 rectangles on parchment paper. Spread the vanilla bean icing first, then pipe stripes of chocolate icing.
- Then, create a chevron pattern using a toothpick. Just drag the tool across the chocolate stripes in opposite directions.
- Set aside the top layers and prepare for the cream layers.
- Pipe 8 big dots of vanilla bean pastry cream on each puff pastry layer. Repeat the step until you have 2 or 3 layers. Place the pastry with topping on the top of the layer.
- It’s ready to be served!
If you don’t want to consume it all in one sitting, you can put it in the refrigerator. But although it can last for 2 days in a refrigerator, its crispy texture might be lost due to the direct contact with fillings for a substantial time. Hence, it’s highly recommended to consume it immediately.
Vanilla Bean Cream Horns

A cream horn is a puff pastry filled with cream fillings. Whether it’s served plain or with toppings, it’s a perfect dessert for every party. If you are a big fan of desserts with toppings, you can try to dip it in chocolate glaze or dust it with icing sugar. To make vanilla bean cream horns, you need vanilla bean pastry cream and 2 packs of puff pastry dough. In making vanilla bean cream horns, do the steps below:
- Line the parchment paper on a baking sheet and preheat the oven to 400°F or 204°C.
- Dust the flour on a flat surface. Then, unfold the pastry sheet.
- Roll out the pastry sheet with a rolling pin.
- Then, cut the pastry sheet into strips with a pizza cutter.
- To make a horn shape, wrap a tube mold with the dough. Dip your finger in the water to make the dough soft enough to be shaped. Be careful not to wrap too tightly or it will be hard for you to get the baked pastry off the mold.
- Place the dough on the baking sheet and bake for 12 minutes until the color changes to golden brown.
- Remove from the oven and let it cool for 20 minutes. After that, gently remove the mold from the pastry and let it cool again for 10 minutes.
- Transfer the vanilla bean pastry cream to a piping bag and fill up the puff pastry from both sides.
- Consume it immediately!
Vanilla bean cream horns are safe to consume for up to 3 days at room temperature. But it’s more recommended to keep it in the refrigerator to avoid the vanilla bean cream going stale.
Where to Buy Vanilla Beans in Bulk for Baking Vanilla Flavored Pastries?
To impart a heavy vanilla flavor into your vanilla flavored pastries, isn’t it a good idea to choose natural flavoring? Vanilla beans are a perfect match to fill this role. It is where the most concentrated vanilla flavor lies. It also adds a gourmet appearance of small black specks that can’t be matched by artificial vanilla flavoring.
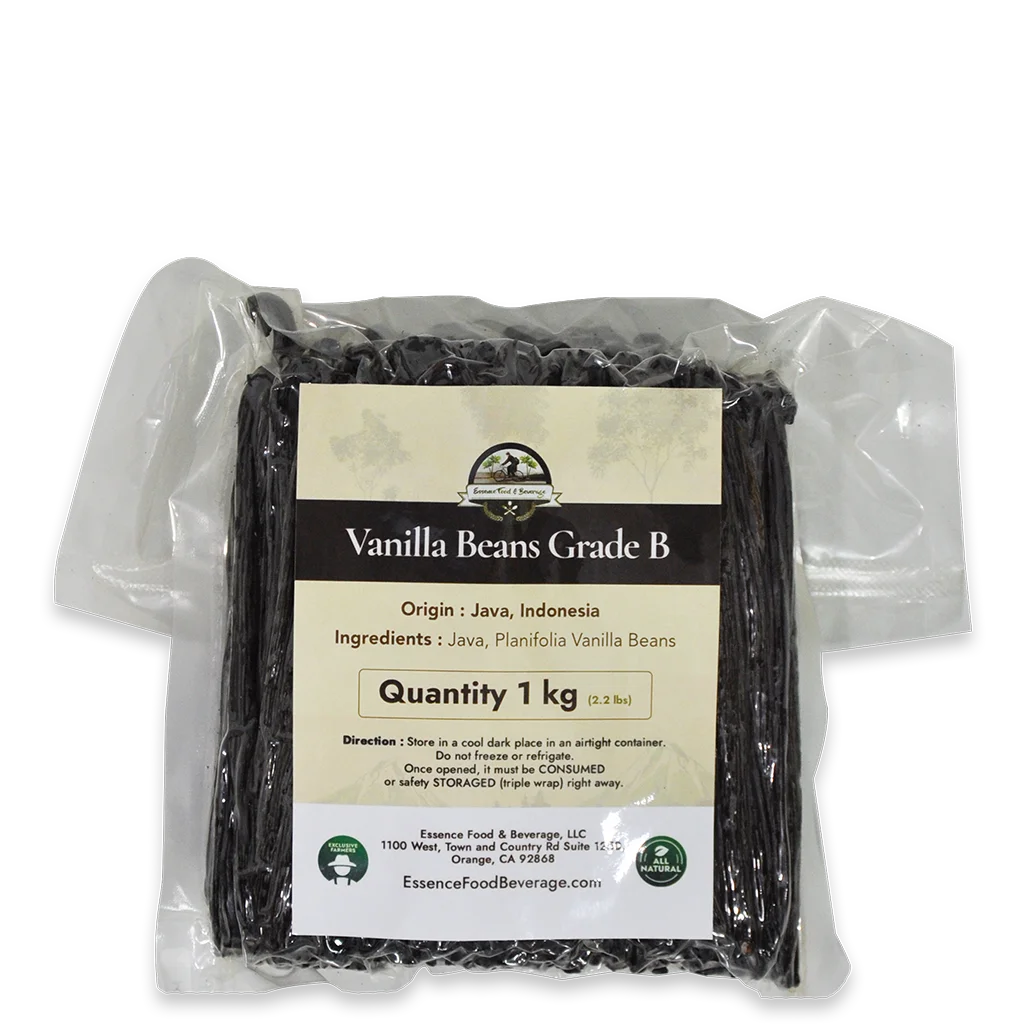
Essence Food & Beverage, LLC is a direct-trade vanilla supplier that has been supplying Indonesian vanilla beans in bulk for decades. Thanks to the plump beans, Indonesian vanilla beans are well-known to hold more vanilla caviar or vanillin content. Hence, you get an extra vanilla sweetness only from a single pod.
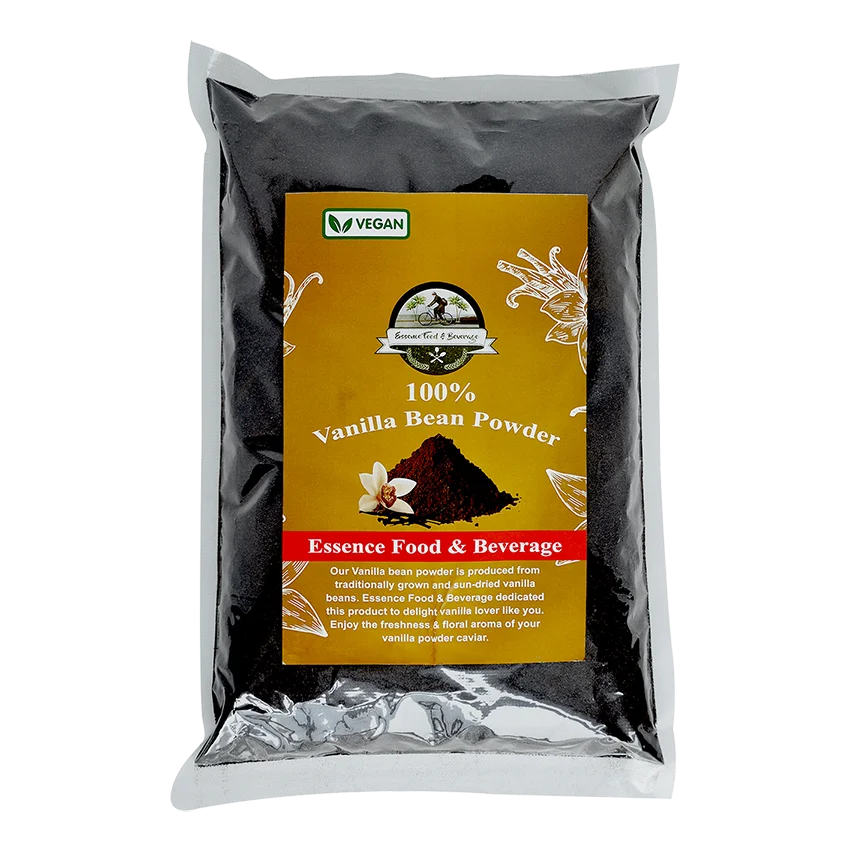
Get the sweetest vanilla beans in bulk and bake a bulk load of vanilla flavored pastries today. Go purchase the freshest vanilla beans in bulk, bulk vanilla bean powder, and other gourmet spices through our website.